In the running example we go through a complete policy testing process to illustrate how XPTester works. All the related files and policies could be found in the example fold in the source code package.
Background
In recent years, in order to improve working efficiency of the employees as well as cut costs, more and more companies allow their employees to bring their personal devices into the workplace and use them to do daily work. This practice is called BYOD, which is short for Bring Your Own Device. The employees can use their personal devices to access the company's privileged applications and information and so on. However, because these devices may be also connected to the internet or have installed many other applications(may include malwares), strong access control policies must be applied to protect the private resources of the company.
Access control requirement specification
The access control requirement specification for XPTester contains a sequence of requirement. Each requirement is a tuple:
<Subject, Action, Resource, Environment, Decision>
Following is the access control requirement specification for the company in our case:
Technician View Business_Plan Deny
HR View Business_Plan Deny
Manager View Business_Plan Permit
Technician Modify Business_Plan Deny
Manager Modify Staff_List Permit
The contents are saved in file named requirement, which will be used later.
Select policy
Start XPTester, if no error occurs, following window should be seen:

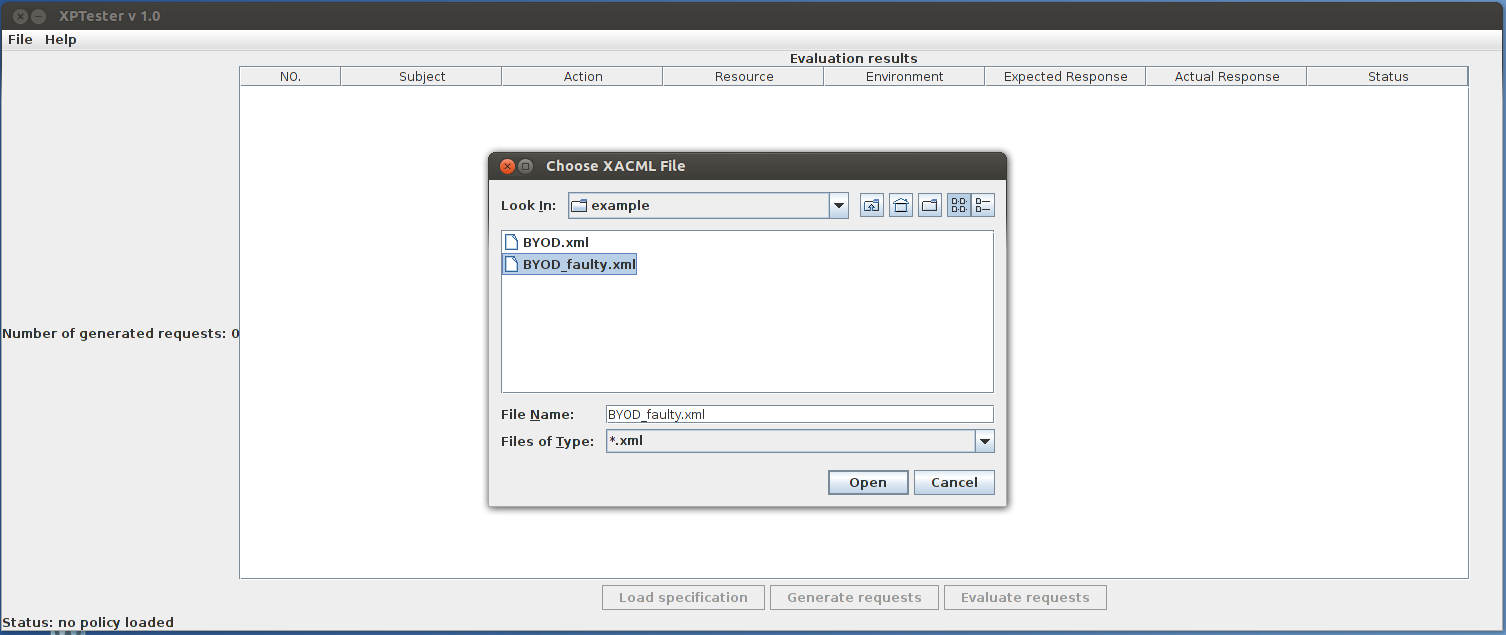
Choose file->open policy to open the policy selection dialogue. Go to example/BYOD
to open the XACML policy for testing, say, BYOD_faulty.xml:
Load access control requirement specification(optional)
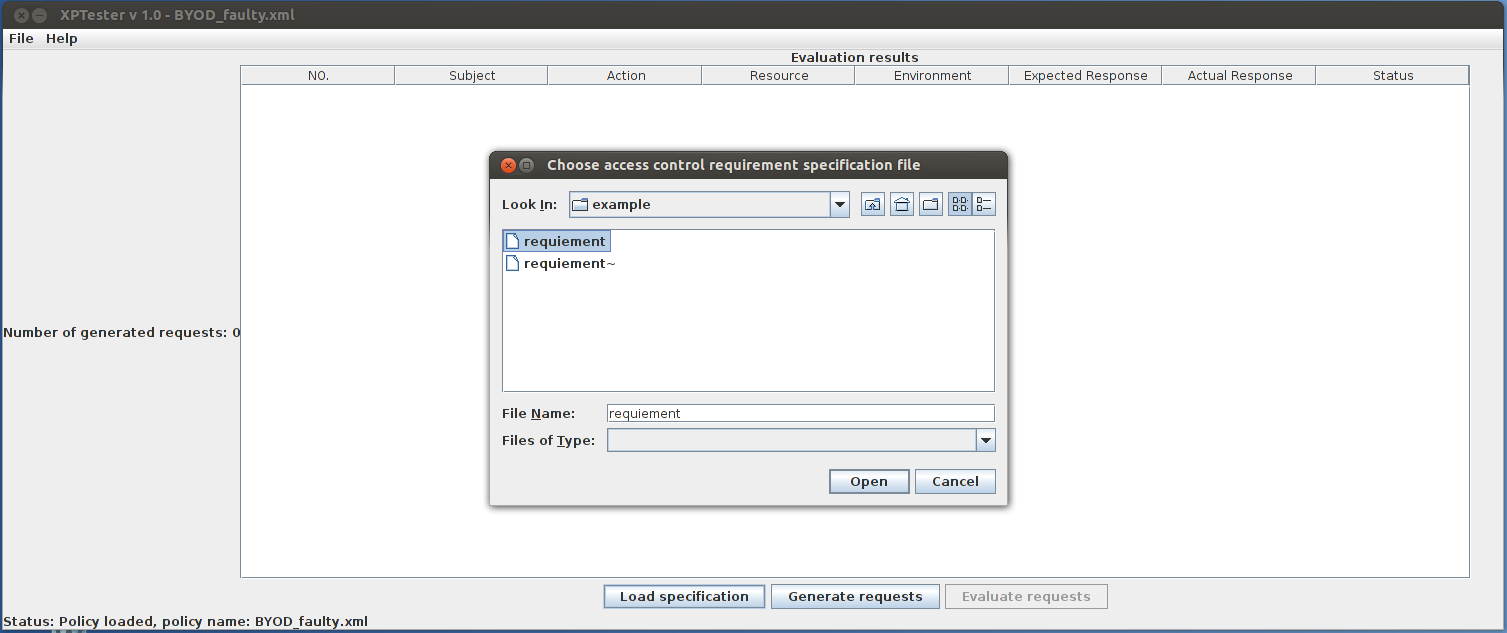
To obtain a testing report that helps in locating faults in the policy at the end of the testing process, an access control requirement specification should be supplied, which, is optional if you think a testing report is unnecessary. Click Load specification button to open the access control requirement selection dialogue:
Generate test requests
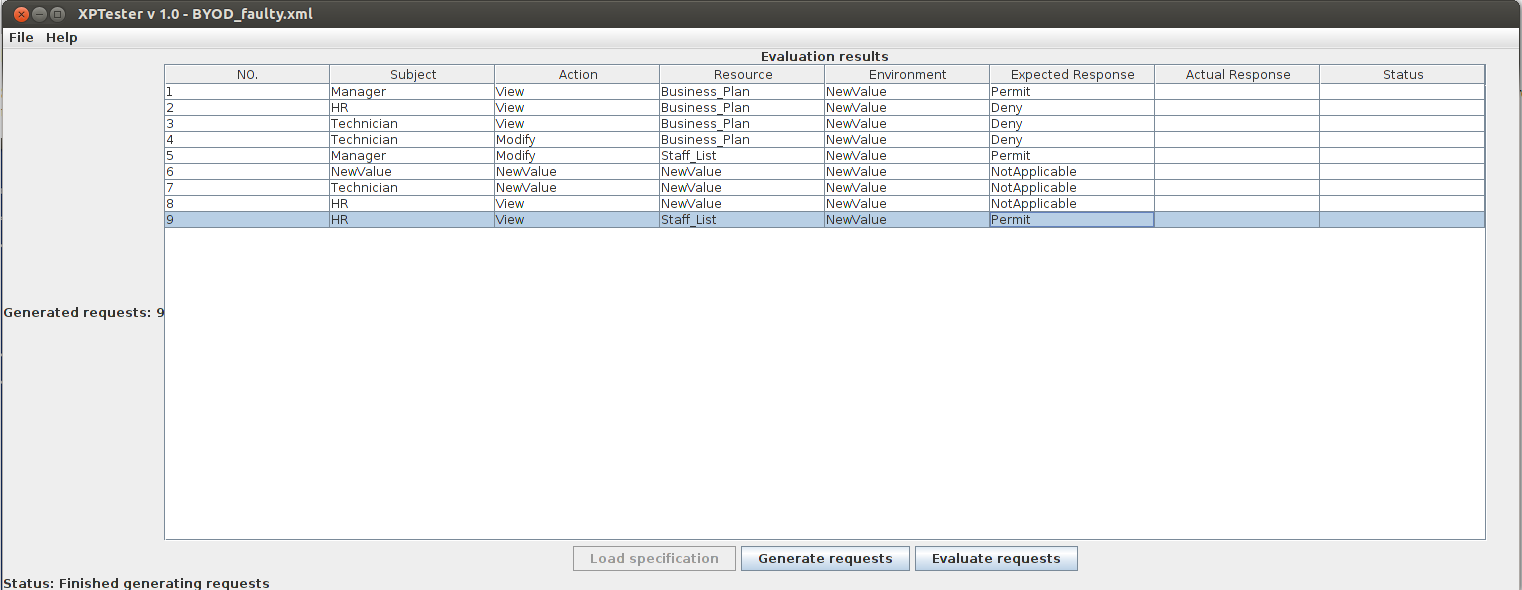
Click Generate requests button, XPTester would automatically generates test requests for the policy under test. After finishing generating, the generated requests will be listed in the main window as following picture shows:

Refine requirements
Skip this section if you also skip Load access control requirement specification. The generated requests may not be included in the access control requirement specification. In this situation, you need specify the expected response for these requests. Click the empty cells in column named Expected response, choose one value amongPermit, Deny, Not-Applicable.
Evaluate the requests
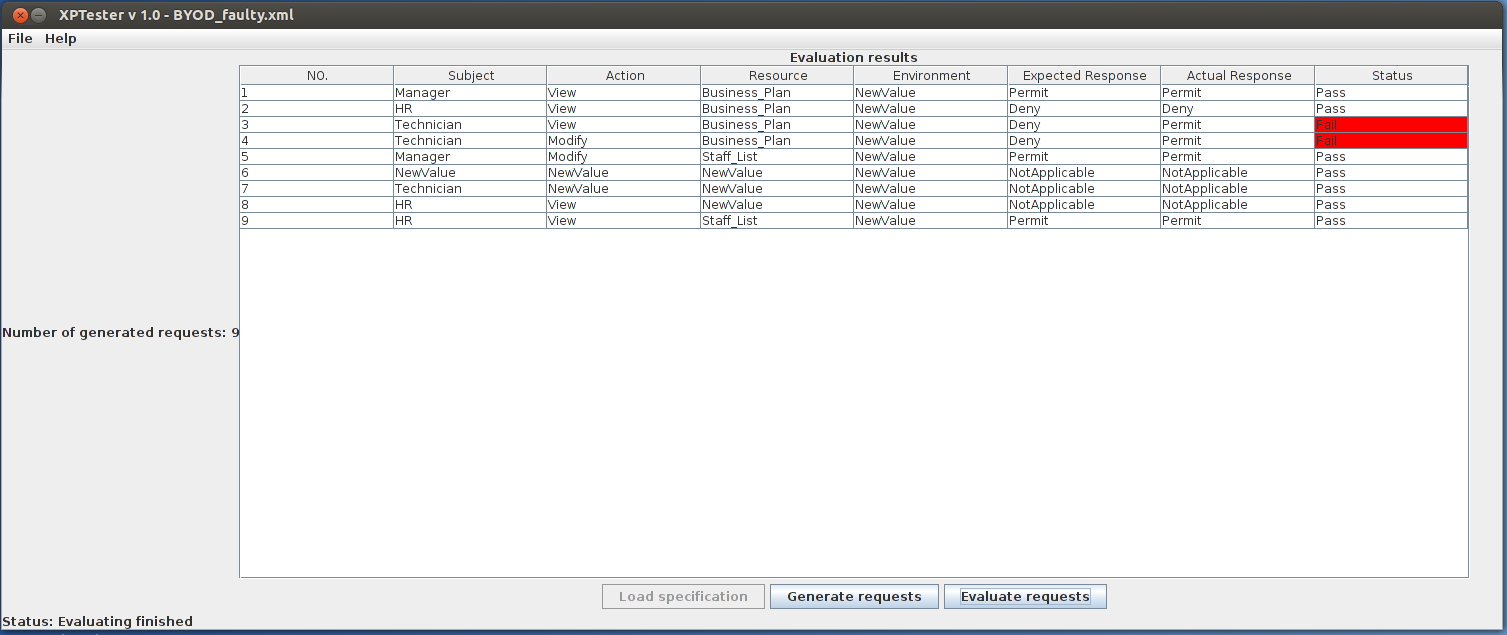
Evaluate the generated requests by clicking Evaluate requests. All the generated requests would be evaluated by the policy under test. When finishing evaluating, the responses to the requests will be illustrated in column namedActual Response. The testers would review manually the response to tell whether the tests pass. Alternatively, if access control requirement specification was supplied, XPTester will do judge on the test results and highlight those failed ones. As following picture shows, the cells of red background indicate failed tests.
Additionally, with access control requirement specification, XPTester will generate a testing report. The testing report is located in XPTESTER_PATH/Policies _Under_Test/PolicyFileName/logs. Open testingreport, following content would be present:
Policy under test: /home/feiniao/Desktop/example/BYOD_faulty.xml
Total number of requests: 9 Number of Failed requests: 2
Failed requests and there log file location:
X_2.xml /home/feiniao/Desktop/XPTester_1.0/Policies_Under_Test/BYOD_faulty/logs/X_2.log
X_3.xml /home/feiniao/Desktop/XPTester_1.0/Policies_Under_Test/BYOD_faulty/logs/X_3.log
The .log files records the evaluating trace information of each requests. By following the trace, it is easy to locate the faults in the plicy.